In today’s digital age, food isn’t just about flavor—it’s also about how it looks. We eat with our eyes first, and let’s face it, when a dish looks stunning, it becomes an irresistible invitation to share on social media. Whether you’re an aspiring food blogger, a home cook looking to up your Instagram game, or just someone who loves to show off a delicious meal, food styling is a key part of making your food look as good as it tastes.
Food styling isn’t just for professional chefs or photographers—it’s for anyone who wants their meals to shine. With a few simple tricks, you can make your home-cooked dishes look Instagram-worthy and capture the perfect shot every time. Let’s dive into the basics of food styling, from arranging your dish to finding the right lighting and props to enhance your photos.
1. Start with the Right Plate or Bowl
The vessel you choose to serve your food in can make all the difference in how your dish appears on camera. A good rule of thumb is to choose plates that contrast well with your food, not too large or too small. Here are some tips for selecting the right dishware:
- White Plates: Classic and versatile, white plates make any dish pop. They provide a clean, neutral background that lets the food take center stage.
- Simple, Not Busy: Avoid overly patterned plates that can distract from the food. The simpler, the better.
- Color Contrast: Think about how your food will look against the plate. Light-colored foods like mashed potatoes or pasta look great on dark plates, while rich, colorful foods (like salads or roasted vegetables) are striking against white or neutral backgrounds.
2. Arranging Your Food: The Art of Plating
Plating is the first step in food styling, and a little goes a long way. Here’s how to make your dish look professional and photogenic:
- Use the Rule of Thirds: When arranging food on a plate, avoid placing everything in the center. Instead, position key elements off-center for a more dynamic composition. Imagine your plate divided into three sections, both horizontally and vertically. Place the main component in one of these sections, leaving the rest open for garnish and textures.
- Layer and Stack: Create height and dimension by stacking or layering components of the dish. For example, stack pancakes, layer a sandwich, or pile a generous portion of pasta for an eye-catching effect.
- Leave Negative Space: Don’t overcrowd the plate. Negative space (empty space) around the food allows your dish to “breathe” and look less cluttered. It also draws attention to the food itself, letting each ingredient shine.
- Garnish with Purpose: Fresh herbs, a sprinkle of cheese, or a drizzle of sauce can elevate a dish, but be mindful not to overdo it. Choose garnishes that complement the dish’s flavors and colors. A small sprig of rosemary or a slice of lemon can add just the right finishing touch.
3. Lighting is Everything
The secret to great food photography is lighting, and natural light is always your best friend. Here’s how to make sure your food looks its best under any lighting condition:
- Natural Light: Whenever possible, shoot in natural light. The soft, diffused glow from windows (especially during the golden hour—just before sunset) creates flattering light that doesn’t cast harsh shadows or make your food look overly shiny.
- Avoid Overhead Lighting: Harsh overhead lighting can create unflattering shadows and make food look unappealing. Opt for side lighting (light coming from the side) or window light to highlight the textures of the dish.
- Use Reflectors: If you don’t have the perfect window setup, you can use a simple white surface (like a white piece of foam board or a reflector card) to bounce light back onto the food. This can fill in shadows and create a more even lighting effect.
- Golden Hour: If you’re shooting outdoors, golden hour (the hour before sunset) is magical. The soft, warm light enhances the color of your food and gives your shots a cozy, inviting glow.
4. Props: Less Is More
Props can help tell the story of your meal, but be careful not to over-clutter your shot. Here are some pro tips for using props effectively:
- Keep It Simple: Think minimalism. A rustic spoon, a textured napkin, or a fresh herb sprig can complement your dish without stealing the focus. Too many props can distract from the food itself.
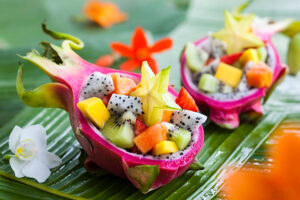
- Use Color Wisely: If your dish is already vibrant, opt for neutral-toned props like wooden cutting boards, simple ceramics, or light-colored linens. If your dish is more neutral, don’t hesitate to add pops of color with a colorful placemat, a bright beverage, or even a colorful cloth napkin.
- Textures Are Key: Experiment with textures to add depth to your photos. Wooden spoons, woven baskets, and rustic boards create a cozy, grounded feel. Adding a linen napkin or a piece of fresh fruit nearby can also bring texture and life to the composition.
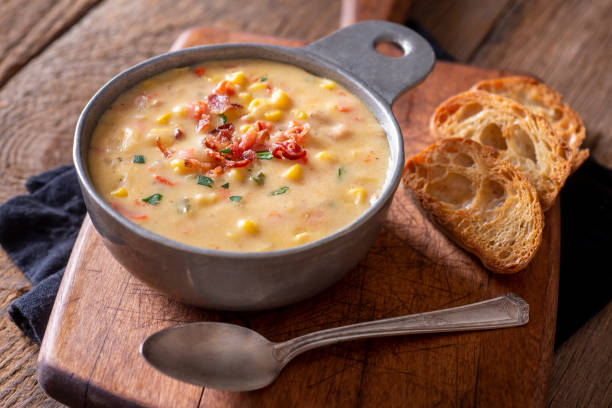
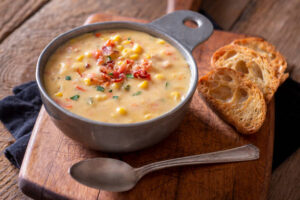
- Incorporate a Story: Props can subtly enhance the atmosphere of your photo. For example, if you’re styling a bowl of soup, include a rustic bread basket or a vintage spoon to evoke a sense of comfort and hominess. If you’re shooting a summer salad, a mason jar of lemonade or a sun hat could help set the scene.
5. Play with Color
Color contrast in food photography can make or break your shot. Here’s how to make sure your food pops:
- Complementary Colors: When choosing garnishes or props, consider the color wheel. Complementary colors (like red and green, or blue and yellow) make your food visually appealing and help each element stand out.
- Vibrant Ingredients: When selecting ingredients, look for vibrant, fresh produce that will add color to the dish. Bright red tomatoes, fresh herbs, or orange carrots can make a dish look more appetizing. Avoid using wilted or overcooked vegetables, which can look dull.
- Keep the Plate Balanced: Aim for visual balance between the colors on your plate. If you have a lot of neutral tones (like white rice or beige pasta), balance them with a vibrant vegetable or a sprinkle of herbs to add some visual contrast.
6. The Perfect Angle
Different types of food look best from different angles. Here’s how to choose the right angle for your dish:
- Overhead Shot (Top-Down): This is perfect for dishes like salads, bowls of pasta, pizzas, or anything that is best appreciated in full view. Overhead shots also work well for group shots (like a spread of appetizers or a family-style meal).
- Side Angle (45-Degree Angle): For dishes with height (like burgers, stacked pancakes, or layered cakes), a side shot helps showcase the layers and textures. This angle also works well for soups or stews, as it shows off the richness of the broth.
- Close-Up Shots: For intricate dishes or ingredients (like a bowl of berries, a close-up of cheese oozing from a sandwich, or a slice of cake), zooming in on the details can capture textures and give a sense of intimacy.
7. Editing: Enhance, Don’t Overdo
After you’ve captured your perfect shot, editing can help bring out the best in your photo. But remember, less is more. Here are a few basic editing tips:
- Adjust Exposure: If your photo is too dark or too bright, adjust the exposure to brighten it up without losing details.
- Boost the Colors: Enhance the saturation a little to make your food look more vibrant, but don’t go overboard or your dish might look unnatural.
- Sharpen the Details: If your food looks a bit blurry, use a sharpening tool to bring out the textures, especially for close-up shots.
- Crop for Composition: If you need to, crop your photo to improve the composition. Ensure the key elements of your dish are centered or follow the rule of thirds.
Making Your Food Shine
Styling food for Instagram is a creative process that combines artistry and a little bit of know-how. Whether you’re snapping a quick pic of your breakfast or preparing an elaborate dinner, these food styling basics will help you capture the essence of your dish and make your followers double-tap in admiration. The key is to keep it simple, use good lighting, and focus on the details.
By arranging your food thoughtfully, choosing the right props, and playing with angles, you’ll soon be styling your meals like a pro—and your Instagram feed will never look the same again. Happy styling and snapping!

